How to Install Metal Framing in Walls in 2026?

Time:2026-10-05 Author:Sienna
0%

In 2026, learning how to install metal framing in walls means understanding more than stud placement. It requires accurate layout, compatible materials, and careful attention to load paths. Don Allen, P.E., AIA, a respected cold-formed steel educator, has stated, “Cold-formed steel is a structural system, not simply a material swap.” That distinction matters on every project.

Begin with approved drawings, the project specifications, and current manufacturer instructions. Confirm the wall location with a laser level or chalk line. Check the floor and ceiling tracks for damage before fastening them. Cut studs with aviation snips or approved power tools. Wear eye protection and gloves. Sharp edges are easy to underestimate.

Place studs at the specified spacing, commonly 400 or 600 millimetres, unless the design requires something different. Keep flanges aligned in one direction. Secure framing with the correct screws, not whatever happens to be nearby. Openings need reinforced jambs, headers, and proper load transfer. Plan electrical and plumbing penetrations carefully. Do not weaken flanges without approved guidance.

Real sites are rarely perfect. A slightly twisted track can create visible drywall problems later. I have seen small layout errors become expensive repairs. That is why each section deserves a level check before closing the wall. Deflection gaps, bracing, fire performance, insulation, and corrosion protection also require verification. Local building codes control the final installation. When structural requirements are unclear, consult a qualified engineer or inspector. Good framing is quiet, straight, and boring. That is the point.
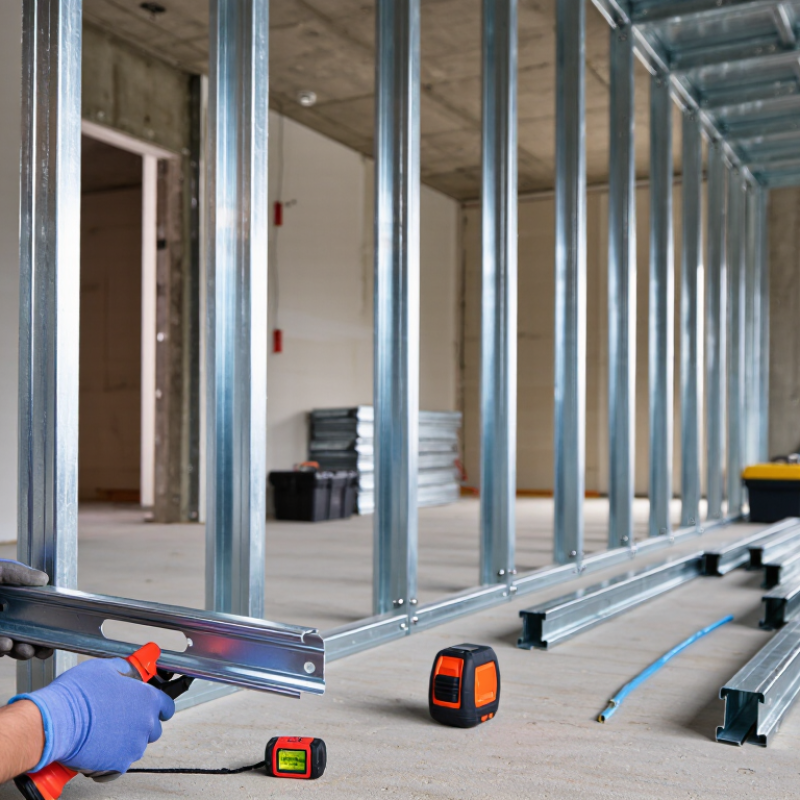
How to Install Metal Framing in Walls in 2026?

Metal Wall Framing Materials, Tools, and Safety Requirements

How to Install Metal Framing in Walls in 2026?

Metal wall framing starts with the correct materials. Use galvanized steel studs and matching tracks selected from the structural drawings. Gauge, width, and spacing matter. Load-bearing walls require engineering review, not guesswork. Add acoustic or isolation strips where sound transfer or vibration is a concern. Keep fasteners compatible with the steel thickness. Thin metal can deform easily.

Useful tools include aviation snips, a screw gun, a laser level, tape measure, crimping pliers, and a sharp marker. Wear cut-resistant gloves when handling studs. Their edges can be surprisingly sharp. Set the tracks accurately before fastening. Check plumb at several points, not only at the corners. Pre-cut openings for services, but protect cables and pipes from screw penetration. I sometimes see installers rush this stage. That shortcut often creates crooked walls and expensive corrections.

Safety needs evidence, not optimism. The U.S. Bureau of Labor Statistics reported 1,075 fatal work injuries in private construction during 2023, with a rate of 9.6 deaths per 100,000 full-time-equivalent workers. OSHA 29 CFR 1926 Subpart E covers suitable personal protective equipment, while Subpart M addresses fall protection. Use eye protection, safety footwear, hearing protection, and stable access equipment. Secure loose tracks and remove metal offcuts immediately. A tidy floor helps. Review the site plan before drilling, especially around hidden electrical and plumbing services. No checklist replaces judgment when conditions change.

How to Install Metal Framing in Walls in 2026?

Metal wall framing typically uses cold-formed steel studs and tracks, self-drilling screws or approved anchors, a tape measure, level, aviation snips, a screw gun, clamps, and appropriate personal protective equipment such as safety glasses, gloves, hearing protection, and work boots.

Selected OSHA safety dimensions for wall-framing work: Fall protection is generally required at 6 feet above a lower level. Portable ladders should extend at least 3 feet above an upper landing when used for access. Guardrail top rails are normally 42 inches high, plus or minus 3 inches, while toe boards must be at least 3.5 inches high where required. Confirm project conditions and local regulations before installation.

How to Plan Wall Layouts and Position Metal Studs

Planning the wall layout makes metal framing faster and more accurate. Start with a scaled floor plan, not a guess. Mark every wall line on the floor and ceiling with a laser or chalk line. Check corners, door swings, window openings, and ceiling changes before cutting studs. Small errors here can spread across the entire wall.

Metal studs usually sit at consistent centers, according to the project design and local building requirements. Mark each position clearly on the tracks. Keep stud faces aligned, especially where cabinets, trim, or wall panels will attach. Install extra framing around doors, windows, and heavy fixtures. Confirm load-bearing conditions with a qualified professional before using light-gauge framing. It is not a safe assumption that every interior wall is nonstructural.

I have found that measuring diagonals exposes layout mistakes early. Measure between opposite corners before securing the tracks. If the numbers differ, adjust the lines now. Do not force the studs later. That shortcut often creates twisted walls and uneven drywall joints. Leave planned pathways for wiring and plumbing, while respecting required clearances and protective methods. Wear gloves when cutting metal. The edges are sharper than they appear. I once trusted a quick pencil mark and misplaced an opening by several millimeters. It was fixable, but frustrating. Recheck every opening against the finished dimensions before fastening the frame.

How to Cut and Install Metal Tracks and Studs

How to Install Metal Framing in Walls in 2026?

Cutting and installing metal tracks and studs requires accuracy, not speed. Begin with the approved wall layout and confirm dimensions at the floor, ceiling, and openings. Use aviation snips for light-gauge sections, or a powered shear for repeated cuts. Avoid rough edges. They can damage cables, insulation, and hands.

Mark the track every 16 inches when the project drawings require that spacing. Do not assume this distance applies to every wall. Structural applications must follow the engineer’s design and AISI S240 requirements for cold-formed steel framing. Cut both track flanges first, then bend the web for a cleaner cross-cut. Install tracks with compatible fasteners and suitable anchors for the substrate. Keep the flanges aligned. Slide each stud into the tracks, maintaining a consistent orientation. Secure studs at intersections and around door openings. Leave movement gaps where the design specifies them.

Tips: Wear cut-resistant gloves and eye protection. BLS reported 1,069 fatal injuries in construction and extraction occupations in 2023. Handle sharp offcuts seriously. Check every opening twice. A small measurement error can spread across the entire wall. I still recheck plumb after fastening; metal framing can look straight before the sheathing exposes the mistake. Keep service holes centered and protected when required by the design. Never enlarge factory-made openings casually. That shortcut may weaken the member and create a costly correction later.

How to Secure Openings, Corners, and Wall Intersections

Metal wall framing becomes dependable when openings are planned before the first stud is fixed. Mark door and window positions on the floor and ceiling tracks. Transfer those marks with a laser or plumb line. Accuracy here prevents twisted jambs later.

Build each opening with doubled jamb studs, unless the project drawings specify another assembly. Add a properly sized header, then install short studs above it at the required spacing. Keep the header level. A small error can become a visible gap around the door. Secure track ends with suitable fasteners, following the structural drawings and local requirements. I usually check the opening diagonals before sheathing. If they differ, the frame is not square. Do not hide that mistake.

Corners need solid backing on both sides. Arrange the studs so the interior lining has a continuous fastening surface. At a three-way wall intersection, use an overlapping stud arrangement or approved clip system. The connection must resist movement without blocking services. Check that electrical conduits and pipes still have a clear route. Leave no sharp cut edges facing where workers will handle the frame.

Wall intersections should remain plumb, aligned, and firmly tied to the main wall. Use temporary bracing until the sheathing adds stiffness. This step is easy to skip. It should not be. I once corrected a corner that looked straight from one angle but leaned nearly ten millimeters across its height. A long level revealed it. Measure again before closing the wall.

How to Install Metal Framing in Walls in 2026? — Securing Openings, Corners, and Wall Intersections
Installation Area Recommended Framing Data Securement Method Key Installation Steps Quality-Control Check
Layout and Planning
  • Mark wall lines on the floor and transfer them to the ceiling.
  • Identify openings, corners, intersecting walls, services, and load-bearing elements before installing tracks.
  • Use framing members sized for the wall height, loading, fire rating, and acoustic requirements.
Snap accurate control lines and use a laser or plumb line to align the ceiling track with the floor track. Confirm the finished wall location, door swing, rough-opening dimensions, and clearance for electrical and plumbing work. Floor and ceiling lines are vertically aligned, and the layout does not conflict with structural or building-service components.
Floor and Ceiling Tracks
  • Use track compatible with the selected metal studs.
  • Install acoustic or isolation gasket where required by the wall design.
  • Track fastener spacing is commonly set at a maximum of 600 mm (24 in.), unless the project specification or local code requires closer spacing.
Use fasteners suitable for the substrate. Place fasteners near track ends and at regular intervals without damaging the track flange. Cut track cleanly, position it on the layout line, drill or drive the approved fasteners, and keep joints tight and aligned. Check that tracks are straight, securely fixed, fully supported, and separated from incompatible materials where corrosion protection is required.
Standard Wall Studs
  • Install studs with the same orientation throughout the wall.
  • Typical non-load-bearing stud spacing is 400 mm or 600 mm (16 in. or 24 in.) on center, depending on board type, wall height, and design loads.
  • Allow the stud to fit inside the track without forcing or twisting it.
Secure studs to tracks with approved screws, crimping, or another specified connection method. Do not rely on friction alone where positive fastening is required. Set end studs first, install intermediate studs at the marked centers, and maintain plumb alignment before board installation. Verify stud spacing, plumbness, flange orientation, and unobstructed pathways for board fasteners and services.
Door and Window Openings
  • Frame each side of the opening with jamb studs designed for the wall height and opening load.
  • Use a properly sized header or lintel above the opening.
  • Add cripple studs above the header where required to maintain the regular stud spacing.
Use doubled or boxed jamb members when required by the design. Connect the header to the jamb studs with approved screws, clips, or track components. 1. Mark the rough opening.
2. Install jamb studs and reinforce them.
3. Install the header level.
4. Add cripple studs above the header.
5. Add sill framing for windows.
Measure the rough opening width and height, check both diagonals for squareness, verify the header is level, and confirm jambs are plumb.
Door Jamb Reinforcement Use a reinforced jamb assembly where doors may transmit repeated impact or where the opening is tall, wide, or heavily used. Install additional studs, boxed studs, or a proprietary-compatible reinforcement method specified by the project documents. Fasten reinforcement continuously enough to prevent movement. Keep the reinforcement flush with the intended board face and provide solid attachment points for the frame, hinges, and strike hardware. Confirm the jamb can support the door frame without excessive deflection and that hardware backing is located correctly.
External Corners Provide a three-stud, two-stud with backing, or other approved corner configuration that supports board edges on both intersecting faces. Mechanically connect the corner studs or use specified corner clips. Ensure the connection does not leave unsupported board edges. Assemble the first wall, position the intersecting stud assembly, and check that both board planes remain straight and square. Both faces have continuous backing, the corner is plumb, and the board joint will land on solid metal framing.
Internal Corners Use a three-stud arrangement, ladder backing, or an approved drywall-backup configuration to support the inside-corner joint. Secure the backing to the intersecting studs so it cannot rotate or pull away during board installation. Install backing before closing either wall face. Maintain enough surface width for fastening both board edges. Both sides of the internal corner have adequate fastening support, with no flexible or inaccessible board edge.
T-Wall Intersections Provide continuous backing where the end of one wall meets the face of another. Use a three-stud, ladder, or equivalent intersection detail. Connect the intersecting tracks and studs with approved fasteners or clips. Fasten the intersection to prevent movement in either wall direction. Position the intersecting wall on its control line, install the backing assembly, and verify that the board joint lands on the backing. The intersecting wall is plumb, the connection is rigid, and both sides provide a suitable substrate for board attachment.
Wall-to-Structure Connections For deflection-sensitive walls, use a head-of-wall detail that allows the designed vertical movement while maintaining required fire, smoke, and acoustic performance. Use the specified deflection track, slip connection, or movement-compatible detail. Do not rigidly fasten components where movement is intentionally allowed. Follow the approved joint width and fastening pattern. Install firestopping or sealant only as required by the tested or engineered assembly. Confirm the movement allowance is unobstructed and that the completed joint matches the approved wall system.
Bracing and Service Openings Add bridging, noggings, or lateral bracing where required by wall height, stud design, sheathing, or engineering requirements. Use compatible straps, channels, clips, or blocking. Reinforce penetrations that reduce stud strength or interfere with board fixing. Coordinate openings for pipes, conduits, and ducts before closing the wall. Protect wiring and piping with approved guards where required. No stud is excessively cut, twisted, or weakened; services are supported and do not prevent proper board installation.
Fastener and Corrosion Control Select screws and anchors according to the metal thickness, substrate, exposure, and required structural or fire performance. Use corrosion-compatible fasteners. Avoid overdriving screws, which can strip the metal and reduce connection strength. Keep dissimilar metals separated where necessary and repair damaged protective coatings according to the project requirements. Fastener heads are properly seated, connections are tight, and there are no sharp projections that could damage boards or services.
Final Pre-Board Inspection Check the completed frame against the wall drawings, opening schedule, fire and acoustic details, and applicable local requirements. Tighten or replace loose connections and add missing backing before boards conceal the framing. Inspect plumb, level, straightness, stud spacing, openings, corners, wall intersections, service clearances, and required reinforcement. Record deviations and obtain approval for any field change before closing the wall. Exact dimensions and fastening requirements must follow the applicable building code, engineering documents, and tested wall assembly.

How to Inspect and Prepare Metal Framing for Drywall Installation

Before installing drywall in 2026, inspect every metal stud as if it could expose a hidden problem. Check for rust, twisted flanges, crushed tracks, loose fasteners, and damaged protective coatings. A straight-looking wall can still carry uneven spacing. Measure stud centers with a tape, then confirm plumb with a laser or level. Small errors become visible after board installation.

Follow the framing design and applicable requirements in ASTM C645 and AISI S240. Verify that stud gauges, track sizes, screw types, and spacing match the approved documents. According to the U.S. Bureau of Labor Statistics, private construction recorded 1,075 fatal work injuries in 2023. That figure supports a simple inspection habit: secure the work area before adjusting framing. Remove sharp cut-offs. Wear cut-resistant gloves and eye protection.

Drywall preparation needs more than a quick visual check. Confirm that electrical boxes, plumbing lines, insulation, and backing are positioned correctly. Use a straightedge across several studs to find waves or proud flanges. Correct movement before boards cover it. I still recheck corners twice, because one missed angle can create a stubborn joint crack. Clean metal shavings from the floor and framing cavities. Do not rely on appearance alone. Record spacing, repairs, and unresolved defects with photographs. A rushed inspection may save minutes, but it can create hours of patching later.

FAQS

How should metal tracks and studs be measured before cutting?

Confirm the wall layout at the floor, ceiling, and every opening. Small errors spread.

Which tools are suitable for cutting light-gauge metal framing?

Use aviation snips for light-gauge sections. A powered shear suits repeated cuts. Avoid jagged edges.

How can a cleaner track cut be made?

Cut both flanges first, then bend the web across the cut. Wear gloves and eye protection.

Should studs always be spaced 16 inches apart?

No. Use that spacing only when the drawings require it. Structural walls need specific design guidance.

How are metal tracks attached to floors and ceilings?

Use compatible fasteners and anchors for the substrate. Keep both flanges aligned. Follow the approved drawings.

How should door and window openings be framed?

Mark openings on both tracks, then transfer the marks with a laser or plumb line. Use doubled jamb studs unless the design says otherwise. Keep the header level.

How can an opening be checked before sheathing?

Measure both diagonals. Equal diagonals indicate a square opening. Do not hide a mismatch.

What details matter at corners and wall intersections?

Provide continuous backing for interior lining on both sides. Use an approved overlapping stud or clip arrangement. Keep services clear.

Why are temporary braces useful?

They keep intersections plumb and aligned before sheathing stiffens the wall. This step feels optional. It is not.

How should service holes and sharp offcuts be handled?

Keep service holes centered and protected when required. Never enlarge factory-made openings casually. Remove sharp offcuts carefully.

Conclusion

This guide explains how to install metal framing in walls safely and accurately, from preparation to final inspection. It covers the essential metal tracks, studs, fasteners, measuring tools, cutting equipment, protective gear, and workspace precautions needed for a successful project. You will learn how to read the wall layout, mark reference lines, plan stud spacing, and position framing members around doors, windows, corners, and wall intersections.

The guide also describes how to measure and cut tracks and studs, attach them securely, and reinforce openings and connection points for stability. Special attention is given to keeping the frame straight, level, properly aligned, and firmly anchored. Before drywall installation, the completed framing should be checked for spacing, plumb surfaces, sharp edges, loose connections, and necessary supports for utilities or fixtures. Following these steps helps create a strong, organized, and drywall-ready wall structure.

Sienna

Sienna

Sienna is a skilled marketing professional with a deep expertise in our company’s core products and services. With a passion for innovation and detail, she plays a pivotal role in crafting insightful blog posts that not only highlight the unique features of our offerings but also provide valuable......